Showing posts with label Desserts. Show all posts

Sunday, March 08, 2009

Pierogi Recipe - Cheese and Potato Filling

One of the most popular, if not the best, Polish dishes is the pierogi. Pierogi is a versatile food that can be enjoyed several different ways. It is basically a dumpling that can be stuffed with meat, sauerkraut, potato, or any other filling of your choice. My personal favorite is pierogi stuffed with cheese and potato. Here is the recipe: Dough 2 cups of flour 3/4 cup of warm water 1 egg 1 tablespoon of vegetable oil 1/2 teaspoon of salt
Filling 2 large or 4 regular sized potatoes 3 slices of Velveeta Cheese 2 tablespoons of cream cheese salt and pepper to your liking

Directions
Peel the potatoes and cut them into small pieces. Put the potatoes in a pot of water and bring to a boil. Reduce the heat to medium/high and let the potatoes cook for 20 minutes or until soft. While the potatoes are cooking, start making the dough. Spray and coat an empty bowl with cooking spray. Add the water, egg, and vegetable oil to the bowl and stir. Then mix in the flour and salt until you make a dough. Take the dough out of the bowl and kneed it on a table with flour until it is smooth and not too sticky. Roll the dough into a ball, put it under plastic wrap, and let it sit for 30 minutes. When the potatoes are done cooking, drain the water out of the pot. Add the Velveeta and cream cheese along with some salt and pepper. You can also add a small bit of milk to make the potatoes easier to mash. Then mash the potatoes until they are smooth and fluffy. Let the potatoes cool. After you let the potatoes cool for about 15 minutes, your dough should be ready. Take a large piece of dough and flatten it out, with a rolling pin, on a table coated with some flour. Use a circle cookie cutter and cut out pieces of dough. With a teaspoon, scoop a small amount of the potato filling and put it in the middle of a piece of dough. Close the dough around the potato and pinch shut with your fingers and a fork. Keep repeating this process until you run out of dough or filling. This should make about 20 pierogi. When you are done making the pierogi, boil them, five at a time, in a pot of water for two to three minutes, or until they float. Then fry them in pan with butter. Now they are ready to eat. You can top them with sour cream, onion, bacon, or your favorite gravy. Either way, this is a dish you are sure to enjoy.

Saturday, October 25, 2008

Free Fudge Recipes

This is one of those fudge recipes that my mom has made ever since I can remember. When I was lucky and none of my other siblings were around, she would let me eat the bits of chocolate left in the bowl. We always used to call it “licking the bowl” at my house. Always one of the best parts of being able to bake with mom. I have had a lot of fudge and none of it has ever compared to this fudge recipe that my mom always made. I do not know if it is because mom made it or because it is a good fudge recipe. Perhaps a bit of both. I hope you get to share it with someone special.


Fudge
2 tablespoons butter2/3 cup evaporated milk1 2/3 cups sugar1/2 teaspoon salt2 cups miniature marshmallows1 1/2 cups semi-sweet chocolate chips1 teaspoon vanilla1/2 cup chopped nuts (optional)
Combine butter, milk, sugar, and salt in a saucepan over medium heat. Bring it to a boil. Cook 4 to 5 minutes, stirring constantly. (Start timing when mixture starts to bubble around the edges of the pan.) Remove from heat. Stir in marshmallows, chocolate, vanilla, and nuts. Stir vigorously for 1 minute. Pour into an 8-inch square buttered pan. Cool in the refrigerator. Cut into squares.
This fudge recipe is for the peanut butter lover in your house. It is a recipe that is also pretty easy to make.
Chocolate Peanut Butter Fudge
1 cup peanut butter chips1 can (14 ounces) sweetened condensed milk2 tablespoons softened butter1 cup semi-sweet chocolate chips1 teaspoon vanilla extract
Put foil in an 8-inch square pan. In a microwave safe bowl, put the peanut butter chips, 2/3 cup of the sweetened condensed milk, and all of the butter. In another microwave safe bowl, put in the chocolate chips and the rest of the sweetened condensed milk. Microwave the peanut butter mixture on high for one minute or until the mixture is smooth when stirred. Then add in 1/2 teaspoon vanilla extract to that mixture. Pour the mixture into the pan. Put the chocolate chip mixture in the microwave for one minute on high heat or until the mixture is smooth when stirred. Add 1/2 teaspoon vanilla extract to that mixture and pour it over the peanut butter layer. Refrigerate and cut into squares when firm.

Tuesday, October 07, 2008

The Health Benefit of Pecans

All nuts have their own health benefits. So do pecans. The pecan nut is not only rich and tasty but the package of health benefits offered by these nuts is pretty good too. It is recommended that you eat pecan nuts to make sure that your diet is in line with the recommendations made by various departments for healthy eating. The great part about pecans is that they are easily available and you don’t have to search high and low for them.
Lowering Blood Pressure
No nuts can help cure blood pressure. However, most nuts including pecans form an integral component of the ‘Dietary Approaches to Stop Hypertension’ eating plan that has been developed by the National Institutes of Health. It can lower your blood pressure and it will definitely suffuse your dietary plan with the nutrients that are essential requirements for controlling hypertension. What’s more you really don’t have to make any effort to eat pecans as they are delicious.


Breast Cancer Prevention
Before we tell you about why pecans help in breast cancer prevention we must tell you that this area of study is in its early stages but it cannot be denied that the pecan nut has essential elements that will help in preventing breast cancer. Pecans are a rich source of oleic acids and laboratory tests that have been conducted suggest that the oleic acid can suppress the activities of those gene cells that might trigger incidences of breast cancer.
A Healthy Heart
It is no secret that a bad heart is a result of excessive amounts of cholesterol in the world. Pecans sort this problem out for you as they contain a compound that has the ability to lower cholesterol levels and beta-sitosterol. The pecan nut can be included in your daily health diet and it would contribute heavily to the lowering of your cholesterol levels, hence if you need a healthy heart, eat pecans.


Treating Your Prostate
Researchers at Purdue University have come up with a great pecan health advantage. The pecan nut has gamma-tocopherol, which is a type of Vitamin E and it is this vitamin that helps kill the cancerous prostate cells and does not affect the health cells. However, the laboratory studies are continuing and the laboratory result would now be confirmed only after test of this Vitamin E element on animals. However, it is proven that the natural compounds found in pecans that lower cholesterol levels also treat symptoms of benign prostate hyperplasia which is a condition in which the prostate gland in men becomes enlarged. This is a non-cancerous condition.
At the end of the day, many dieticians and health practitioners advise people to at pecans as they are a great substitute for meat products. They have high levels of proteins and also contain fats that are cholesterol free. It is generally considered that one ounce of meat is equal to 10 pecan halves. So, the next time that you think you want to eat meat; and you have health problems, try to go for a mouthful of pecans.

Enjoy Strawberries

Don’t you just love strawberries? They are so succulent and bittersweet. And they compliment so many foods, snacks and deserts. And yes, especially deserts!
One of the first things you think of when it comes to strawberries is strawberry shortcake! Nowadays, you can buy the little cakes at the store in a package. Simply slice up the strawberries in some simple syrup (sugar and water), put them on the cakes, and put on some whipped cream topping! You’re good to go, and wow is it delish!


Strawberries are a great topping for any cake, basically, but especially angel food cake! Angel food cake is light and fluffy and has a unique texture unlike any other cake. And yes, this red, juicy fruit goes just as well with this kind of cake as it does with shortcake!
What about ice cream? You can get low-fat ice cream or frozen yogurt and top it with strawberries! You don’t have to mix the fruit with syrup this time, either, since the ice cream gives you the sweet flavor to balance out the sour in the strawberry. If you do want some liquid to cover the ice cream, you can mash up some strawberries in water (without sugar), for a healthy syrup! Tastes just as good—without the extra carbs and calories!


How about a good old strawberry pie? There are many ways to make strawberry pie, but one way is to buy strawberry pie filling, combine it with freshly sliced strawberries, and put it in a pre-made graham cracker crust (or a regular pie crust)! Yummy! Of course, you MUST serve it with whipped cream topping or ice cream (or both, if you’re really feeling adventurous!). Take it easy, too—this particular choice is high calorie!
Strawberries are great with sundaes. You can put them in with your favorite sundae toppings, like nuts, bananas, chocolate syrup, and so on!
And of course, everyone loves strawberry cheesecake! This is really easy to make! All you have to do it buy a cheesecake kit from the store and make it in a pie tin. No baking is required, although, you do have to put it in the fridge so it can set. When you serve it with strawberries (mixed in simple syrup) and whipped cream (optional), it is simply “to die for”! Might be a little rough on the waistline—oh, but what a way to go!


Strawberries are also a must in fruit salad. Combine them either whole or sliced with your favorite fruits. This can include pineapple, sliced apple, mandarin oranges, banana slices, grapes, or any other fruit you can think of! This too, tastes absolutely stunning with whipped cream. Walnuts really go well with this treat, as well!
I bet you could go for some parfait in the morning, or for a mid-day snack! Strawberries are a must, here, too! Take low fat yogurt and throw in your favorite fruits, sliced up. Then top it with granola and we’re talking healthy, mouth-watering goodness! This is a good alternative to having the ice cream or other deserts, too, since it’s easier to incorporate into your diet!
Strawberries and other fruits are also great with fondue, but watch it—that chocolate can be pretty high cal! And remember, fruit has carbs of its own! So always moderate with sweets!
Enjoy all of your favorite snacks and deserts, and don’t forget the strawberries!

Roasted Pecans

Roasted pecans have been researched by many different university studies as well as medical studies and have been found to have a positive effect on the health. It makes no different whether you eat them roasted or plain. Diets rich in pecans tend to have a lower cholesterol level than other foods. They were also found to have a very high antioxidant power to clean the body of the toxins it carries around. They rank high in the top ten of rich antioxidant foods. Roasted pecans might also be able to help with certain cancer types and help to prevent certain diseases.


Dropping Pounds
You can also expect to loose come weight as you add roasted pecans to your diet. They have been found to help lower weight and also help to keep it off once the individual has reached their weight loss goal. Roasted pecans raise the metabolism and keep the body satisfied and not feeling hungry. If one will add the roasted pecans to their diet each day, they will be able to see results from their efforts. They are perfect for those times when you are feeling hungry but it is not yet time to eat. Eat a handful of the roasted pecans and this should give you energy to complete a few more hours of wait time until dinner is ready.


Happy Heart
Roasted pecans give you a very happy heart because of their ability to provide the body with unsaturated fats. These are what produce health cholesterol. The roasted pecans, themselves, have no fat in them but contain the same amount of protein as you would find in an artery clogging piece of red meat. This seems to be a nice trade off especially when you are trying to be healthy. You can add them to different recipes to give them a little zing. This might be helpful in dishes you do not especially care for but are trying to eat as a result of a healthier diet. The pecans will give you a much richer and buttery flavor without all the fats and salt.
Salt Free Individuals
If you are worried that the roasted pecans contain large amounts of sodium, you need not be. The pecan, itself is sodium free. For those who are on a salt restrictive diet, this means you can eat these anytime without fear of having to count the sodium intake. They might actually give you the special kick you need if you add them in dishes where you used to enjoy large amounts of salt.


Completely Nutritious
It is true that roasted pecans have high amount of calories but they have all the other benefits that you need for a health food. They are loaded with vitamins and minerals and are good for the diet. There is no reason why you should not consider them as a new addition to your healthy diet each day. You can find them online at many of your favorite online stores and can have them sent directly to your door ready to serve.

Chocolate Pecan Pie

If you’re hungry for something a little bit unusual, then you’re going to love a chocolate pecan pie. This tasty treat combines the very traditional pecan pie with one of the most beloved sweet foods: chocolate. That’s the beauty of this tantalizing concoction. Below are some great ideas on how to use a chocolate pecan pie as a substitute for some of your most common dessert needs.
Cake Haters Rejoice!
Did you know some people in the world hate cake? For people with a genuine sweet tooth, it may be hard to imagine but there are lots of people out there who don’t enjoy eating any type of cake. That means you need an alternative available for wedding receptions, birthday parties, even office parties.


Chocolate pecan pie can be a wonderful cake alternative for many reasons. One of the best parts of cake is the rich icing but most pies can’t come close to capturing that same level of sweetness: a chocolate pecan pie definitely can. All of that gooey baked corn syrup definitely kicks in enough sugary goodness to ease the call of any sweet tooth.
Plus, chocolate pecan pie works as an alternative because it’s more unusual than most of the pies you could choose. It’s a real conversation starter, too.
Holiday Treat Repeat No More
You know how you’re always being asked to bring some type of food to company parties, especially around the holidays, or family gatherings? Well, most of the parties end up with a dozen plates of pumpkin or apple pie, some rice krispy squares, and some type of banana pudding. Why not liven up the event with a different kind of dessert: the chocolate pecan pie.
Chances are that most of the people at your office won’t be bringing their own (unless they’ve also read this) but they’ll be begging for the recipe before the day is over.
Cookies are Cliché: Chocolate Pecan Pie is In
Many of us love the idea of passing out some type of edible treat as a gift either for the holidays, a birthday, or just because we want to show our friendship. The standard gift always seems to be cookies, possibly because they come in so many different flavors and are easy to put away in a tin.
If you’re looking for something a little more creative next time you want to give an edible gift, consider a chocolate pecan pie. The taste is amazing and they are easy to wrap. Just make sure to label the package so you don’t end up turning it upside down.
Great Ideas for Your Chocolate Pecan Pie
Of course, you don’t need an excuse to choose chocolate pecan pie over other desserts. Even if you love cake and can’t get enough of cookies, there’s no reason you can’t indulge your sweet tooth in something a little out of the ordinary.

Thai Coconuts

Coconuts are the seeds that grow coconut trees. Given time, a coconut will sprout and take root. The juice and flesh of the coconut provide water and fertilizer to grow the young new tree. Coconut trees are grown throughout Thailand on raised beds with irrigation canals on each side. In some places, trained monkeys even harvest the coconuts. Coconuts provide juice to drink, flesh for eating or for making coconut milk, and play a role in many non-food items as well.
Coconut trees are treated as propitious in Thailand. They are often included in gardens along with other trees that include the word "ma" - for example, ma muang (mango), ma la gor (papaya) and ma prao (coconut) - to bring good luck and basic prosperity. Oil from coconuts is produced by first drying the flesh for several weeks and then pressing it. Sugar is made from sap of the seed pods of the coconut. Sap is boiled and set, and a light brown sugar (palm sugar) results.


Fresh coconut milk is widespread in Thailand. Thais often buy it freshly pressed (the first pressing yields creamy coconut milk, the second is more like water with nutrients). Coconuts are sometimes roasted which concentrates the sugar to make the flavor sweeter. Coconut milk is used in some Thai soups and curry dishes (such as green curry, massaman and panaeng curry) and can be a key ingredient in harmonizing a tasty flavor and consistency.
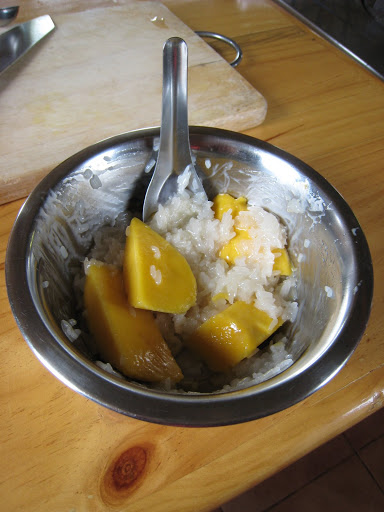
Coconut milk is used to make the sauce poured on mango with sticky rice. It is also used with black sticky rice desserts. In Thailand, one also often finds for dessert what appears like a buffet choice: many containers gathered together of freshly prepared fruits as well as items like lotus seeds or corn.

The customer selects from some of the containers and these are put together over crushed ice and a fairly sweet liquid containing coconut milk. Speaking of desserts, another favorite is coconut ice cream - contrasted with making it from dairy products, a delicious version can also be found which is made from coconut milk and cream. It is slightly icy and some versions include small pieces of sweet coconut meat. Some Thai restaurants in the US have this. And of course on cooking, second best to fresh coconut milk is canned coconut milk.
In Thailand, one can also buy young coconut from stands on the street where the vendor will chop open the coconut for you and you can enjoy the fresh coconut and juice. There are a variety of other tasty snacks and appetizers as well. There are many examples of Thai food with coconut, which combine potential health benefits with enjoyable snacks and dishes. Coconut contains substances such as lauric acid known for benefits such as anti-microbial effects. Two other positives are that coconut oil does not contain trans fatty acids, and most of its saturated fat consists of medium-chain fatty acids rather than long-chain, which means it gets digested and used more easily and is less likely to be stored long-term as fat.

Interestingly, the fat and oil of coconuts contain many beneficial aspects. In addition to antiviral, antibacterial, and antiprotozoal functions associated with lauric acid, natural coconut fat helps normalize body lipids, protects against liver damage, and perhaps most importantly, improves the immune system's anti-inflammatory response. Good saturated fats also contain micronutrients and vitamins that are vital to metabolism. Coconut milk helps balance cholesterol and metabolism, and provides valuable fatty acids. The positive aspects of coconut and palm oil generally are likely part of the reason Thais have such a low rate of heart disease.
There are non-food uses from the coconut tree as well. Dried shells are used in making kitchen utensils such as spoons, as well as other household items such as lamps. Some musical instruments are also made with the shells. The fibrous outer layer of the coconut is also used for fuel as well as roofs. It is also a component for cosmetics and soaps.
Thai medicine also makes use of the coconut (tree, leaf, shell, juice). To conclude, suffice it to say there are a rich variety of food and non-food uses for coconuts!

Mouth-Watering Thai Desserts

Thai cuisine is famous for its intriguing delicacy and spiciness. However, Thai desserts have been overlooked. The three Thai desserts famous outside of Thailand are mango with sticky rice, deep-fried bananas and coconut ice cream. There is a broad tradition of desserts in Thailand over the centuries which offers many ideas and choices.
What are the common desserts that Thais eat? Thais loves desserts (called Khanom in Thai). The well known dessert is Mango with Sticky Rice, but it is a seasonal dessert, around April to June. Deep-fried banana fritters (Gluay Tod in Thai) or bananas in coconut milk (Gluay Buat Chee) are also well known desserts in Thai restaurants in the U.S. In Thailand, there are all kinds of desserts, both non-seasonal and seasonal, from deep-fried to steamed. Some of the most common Thai desserts include the egg-yolk desserts; Thong Yip (Pinched Gold), Thong Yod (Drop of Gold) and Foi Thong (Golden Threads). Thong simply means Gold. The color of these three desserts is a yellow-like golden color from the egg yolk, and is used to signify prosperity and auspiciousness. These "three musketeers" desserts are often used in wedding ceremonies or commemoration of a new house as well.


Khanom Chan or layered dessert is another common dessert. The name of the dessert comes from the fact that it has 9 layers with color variations. The dessert uses only 2 colors: white and a light tone of a color like green or purple. White is used in every other layer. This dessert is also used in important ceremonies like weddings or the grand opening of a new business. Thais believe the number "nine" is an auspicious number which represents progress and advancement.


One of my favorite desserts is Luk Choob. Made from mung dal beans, this dessert is a collection of miniature replicas of fruits and vegetables. The fruits and vegetables are colorful and glossy, artistically carved, and styled with vegetable dyes and glazed in the gelatin-like agaragar. Bua Loy Benjarong is another interesting dessert. Bua Loy Benjarong is gluten balls in coconut milk, a dish that has been with Thailand for over 200 years. The little balls, the size of the tip of the pinky, are made from sticky rice flour mixed with natural colors. Benjarong refers to 5 natural colors: green (from pandanus leaf), purple (from taro and Chitoria Tematea Linn flower), yellow (from pumpkin), blue (from Chitoria Tematea Linn flower) and white (from jasmine water).
Additionally, tapioca and black beans in coconut milk (Sakoo Tao Dum), coconut custard in a hollowed pumpkin (Sangkhaya Fak Thong), grilled coconut cakes (Paeng Jee), mung dal beans and lotus seeds with coconut topping (Tao Suan Med Bua) are desserts, to name a few, that are common in Thailand.

Thai desserts have always been a part of Thai culture. They reflect caring, patience and an enjoyable way of life. Unfortunately, as time passes, some of the traditions and beliefs are being forgotten in Thai society, although most kinds of desserts still exist. Their tempting and satisfying tastes leave a lasting impression - which is in turn an integral part of why Thai desserts have not been lost with time.

Fragrance unique characteristic of Thai desserts

Fragrance is another unique characteristic of Thai desserts. There are many ways of making good aromas with Thai desserts but the most common ones are using jasmine flowers (Dok Ma Li), rosa damascene (Dok Ku Laab Mon - roses family), cananga odorata flowers (Dok Kra Dang Nga) as well as fragrant incense candles (Tien Ob).

Since the old days,

Thais love using jasmine water in desserts because of its aroma. Thais would pick jasmine flowers around 6pm and gently rinse with water so that the flowers do not get bruised. The jasmine flowers (Dok Ma Li) are then soaked in water with a closed lid, and left until around 6am-7am the next morning. The resulting scented water is then used to make the dessert. Keeping the jasmine flowers for more than 12 hours will start to bruise the flowers and the water will not have a good aroma.

Rosa damascene (Dok Ku Laab Mon) is used in a different way. Thais only use the pedals. Each pedal is torn into 2 or 3 pieces and then placed in a closed container that has a dessert in it for a certain period of time, usually overnight. For cananga odorata flowers (Dok Kra Dang Nga), Thais first burn them with a fragrant incense candle, and then place only the pedals in a closed container that holds the dessert. For some desserts, burning fragrant incense candles next to desserts in closed containers will be enough to give the desserts an intricate aroma.

List of Colouring For Famous Thai Dessert

Thai desserts are well known for their intriguing light tones. Generally the colors used to attract people are made from natural flowers or plants. The following are examples of the most common color sources used in Thai desserts:
Pandanus leaf (Bai Toey): giving a dark green color;


Spathe of coconut or palmyra palm leaf (Kab Ma Prao or Bai Taan) : giving a black color;
Turmeric (Kha Min): giving a yellow color;
Flower of Chitoria Tematea Linn (Dok Un Chun): giving a blue color (adding lime juice will give a purple color);
Flower of Aeginetia Pedunculata (Dok Din): giving a black color (but the flower is actually a dark purple color);
Saffron (Yah Fa Rang): giving a yellow-orangish color;
Roselle (Kra Jiab): giving a dark red (maroon-like) color;
Lac (Krang): giving a red color;

Thai Desserts -fresh coconut and Sugar is a must

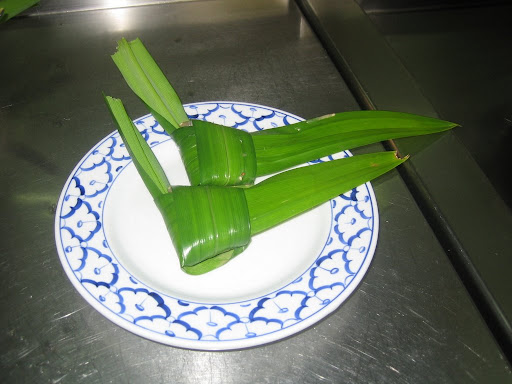
To make high quality Thai desserts, fresh coconut is a must. Back in the old days, only fresh coconut was used in making Thai desserts. And at present, to make coconut milk, finely grated coconut meat is still steeped in warm water, not hot water. It is then squeezed until dry. The white fluid from the first press is called "Hua Ka Ti". Warm water is then added again to make the second and third pressed coconut milk, which is called "Hang Ka Ti." Finely grated coconut meat is generally used about 3 times and then discarded. Freshly pressed coconut milk has a better taste and aroma than commercial coconut milk in a can. However, with a fast pace of life, or the focus more on other elements of life, it becomes more common for a family to use commercial coconut milk.


Sugar is one of the main ingredients in Thai desserts. The two common sugars used in Thai desserts are Coconut Palm Sugar and Palm Sugar. Coconut palm sugar is made from coconut palm, whereas palm sugar is made from the sap of the sugar palm or palmyra palm, called Taan in Thai. Palm sugar is often used interchangeably with coconut palm sugar but they are different in many ways. For instance, palm sugar is dryer and more solid than coconut palm sugar. It is also more expensive than coconut palm sugar. In some dessert recipes, coconut palm sugar is often replaced with palm sugar. The replacement may lend the same general look to the dessert but the dessert will be different in taste and aroma.

Free Recipes for Italian Desserts

Lurking beneath the surface of many recipes, however, is disaster more ferocious and inevitable than a hurricane over warm Gulf of Mexico waters. Poorly written or shakily tested recipes can turn a counter full of expensive, high-quality ingredients into a bowl full of meaningless goo unfit for human consumption.


But how can you tell the difference between a great recipe that will earn a spot among your most favorite creations and one that is fit only for the trash heap of culinary failure? How can you justify sinking premium bucks into high quality ingredients when you don't know if the result will be edible? If you have just a little cooking savvy, it's not all that hard to do.

First off, what are you trying to make? Is your search for free recipes for Italian desserts after cheesecake? Cannoli? Gelato even? It helps a lot if you've eaten what you're trying to make at least a few times, so you know what the finished product should look like.

The next thing to look at is the list of ingredients. Are you familiar with all of them? If there are any you don't know, do you have research sources available that will give you sufficient knowledge to let you continue? Then take each ingredient and make sure it appears in the text of the recipe. This is one of the most common failures in recipe writing and editing, especially with free recipe content. Sometimes, your own cooking savvy will tell you where and when to add in a missing ingredient, but don't proceed unless you are dead sure.

Finally, go over the directions. If it is a baking recipe, does it start with preheating the oven? That should be your first step unless the dough or batters need to be refrigerated. Is there equipment mentioned in the direction the ions, such as an ice cream maker, that you do not own? Are you familiar with all the cooking terms used? If you've never made a reduction, for example, you might want to do some additional research.

Once you've done your research, you're ready to set off into the world of free recipes for Italian desserts!

Apple Pie With Pastry Recipe

I remember growing up with my sisters, cousins, and others as we enjoyed playing in our grandparents apple orchard. "In the old days", as my grandkids like to say, we didn't have air conditioning, electronic games and toys, tv, or other modern ways to entertain ourselves. We played cowboys and Indians, house, school, etc to entertain ourselves. The shade provided by the big, old apple trees provide a great place for playing. But the best part of the apple orchard was watching the apples grow and ripen. We knew we would soon enjoy delicious apple pies and other great treats made from those apples. Here I share with you one of the apple pies from those days.


TRADITIONAL APPLE PIE!


Pastry for a double-crust 9-inch pie:

2 cups unsifted all-purpose flour

1 tsp salt

2/3 cup lard or solid vegetable shortening

5 to 7 tbsp ice water

In a large bowl, stir flour and salt together until blended. Using a pastry blender or two knives, cut lard or shortening into flour mixture until the mixture becomes mealy.

Mix in ice water a little at a time with a fork, stirring until the mixture leaves sides of bowl and forms a ball. Finish shaping dough into a ball with your hands, cut in half with a knife to form two balls for the top and the bottom of the pan. On a lightly floured board, flatten one ball of dough and roll with a lightly floured rolling pin from center to edge in a circular fashion, making a 12-inch circle. Place pastry into a 9-inch pie pan, fitting gently and trimming off excess dough with sharp knife or scissors. Fill or bake according to recipe. Roll out remaining dough in the same manner to use as a top crust.

Pie Filling:6 cups thinly sliced, peeled, tart cooking apples1 tbsp lemon juice1 cup sugar2 tbsp flour1/4 tsp salt1 tsp ground cinnamon1/4 tsp ground nutmeg1 tbsp butter or margarinePreheat oven to 425 degrees.Slice apples into a large bowl and sprinkle with lemon juice. Add sugar, flour, salt, cinnamon, and nutmeg to apples; mix together well. Mix apples again with a large spoon then turn into pastry lined pie pan. Dot the surface with the butter or margarine. Place top pastry over pie and seal the edges well. Cut steam vents in center of the top crust or poke several times with a fork. Bake pie in a 425 degree oven for 45 - 55 minutes or until crust turns a golden brown and the filling starts to bubble up through the vents.

Homemade Cinnamon Rolls (in 2 Hours or Less!) - Yummy!

Homemade Cinnamon Rolls from Scratch (in 2 hours or less!)


2 cups of warm water
1/2 cup sugar4 teaspoons dry yeast (or two packages of dry yeast)
2 eggs1 teaspoon salt
1/3 cup Canola oil (I use Canola, but you can use any kind of cooking oil) (you can also use shortening, if you prefer)
6 to 7 cups of flour (use 1 to 2 cups of whole wheat flour if you want)

Dissolve the yeast in the warm water. Let sit for a minute or two. Add the sugar and salt. Mix. Add the cooking oil (or shortening), 2 eggs, 2 cups of flour and beat until smooth.

Stir in 3 more cups of flour. Begin kneading the dough, adding the final cup of flour. If the dough seems too sticky, knead in more flour, a quarter to a half cup at a time.

Let the dough "rest" for 15 to 20 minutes. (I leave it sitting on the counter and use the time to wash up the bowl and other utensils and to clean off the counter top.) Roll the dough into a rectangle that's 24 to 30 inches long by about 16 inches wide. Spread with soft butter and sprinkle with cinnamon and sugar.

Cut the cinnamon rolls into equal sized slices (approximately one inch wide each or slightly more) and place into two greased 9x13 pans. Put in a warm place to rise for 45 minutes. Bake at 350 degrees for 25 minutes (or until the cinnamon rolls are golden brown). Allow to cool for 5 minutes and then turn out of the pans. This recipes makes two dozen cinnamon rolls. If you want REALLY BIG cinnamon rolls, cut into 12 equal pieces 2 inches wide.

Sunday, October 05, 2008

Pierogi Recipe: Sauerkraut Filling

Pierogi is one of the first things that come to mind when you talk about Polish cuisine. The reason pierogi is such a popular dish is because they can be prepared several different ways. The pierogi is a dumpling that can be stuffed with any filling of your choice.

Here is a recipe for pierogi stuffed with sauerkraut. Dough: 2 cups of flour ¾ cup of warm water 1 egg 1 tablespoon of vegetable oil ½ teaspoon of salt Filling: 1 14.5 OZ can of sauerkraut 3 slices of bacon ¼ cup of diced onions 2 tablespoons of butter Directions: Coat an empty bowl with cooking spray. Add the water, egg, and vegetable oil, and stir. Mix in the flour and salt until you make a dough. Take the dough out of the bowl and knead it on a table coated with flour until it is smooth and not too sticky. Roll the dough into a ball, place it under plastic wrap, and let it sit for 30 minutes. While the dough is sitting, prepare the filling. Cut the bacon into small squares and place into a medium sized pan. On medium-low heat, cook the bacon until light brown. Add the onions and butter. Once the butter melts, drain the sauerkraut and add it to the pan. Stir in the sauerkraut thoroughly with a small fork. Reduce the heat to low and cover the pan.

Let the sauerkraut sit for 20 minutes, stirring occasionally. Now that your dough and filling is done, it is time to make the pierogi. Take a large piece of dough and, with a rolling pin, flatten it out on a table coated with flour. Cut out small, circular pieces of dough using a cookie cutter. With a teaspoon, scoop out a small amount of sauerkraut filling and put it in the center of the dough. Close the dough around the filling and pinch shut using your fingers and a small fork. Repeating this process should yield about 20 piergoi. In a pot of boiling water, add the pierogi, five at a time. Let them boil for 2-3 minutes or until they float. Then, fry the pierogi in a pan with butter and add your favorite topping. They are now ready to eat.

Pierogi Recipe: Cheese and Potato Filling


One of the most popular, if not the best, Polish dishes is the pierogi. Pierogi is a versatile food that can be enjoyed several different ways. It is basically a dumpling that can be stuffed with meat, sauerkraut, potato, or any other filling of your choice. My personal favorite is pierogi stuffed with cheese and potato. Here is the recipe: Dough 2 cups of flour 3/4 cup of warm water 1 egg 1 tablespoon of vegetable oil 1/2 teaspoon of salt
Filling 2 large or 4 regular sized potatoes 3 slices of Velveeta Cheese 2 tablespoons of cream cheese salt and pepper to your liking


Directions
Peel the potatoes and cut them into small pieces. Put the potatoes in a pot of water and bring to a boil. Reduce the heat to medium/high and let the potatoes cook for 20 minutes or until soft. While the potatoes are cooking, start making the dough. Spray and coat an empty bowl with cooking spray. Add the water, egg, and vegetable oil to the bowl and stir. Then mix in the flour and salt until you make a dough. Take the dough out of the bowl and kneed it on a table with flour until it is smooth and not too sticky. Roll the dough into a ball, put it under plastic wrap, and let it sit for 30 minutes. When the potatoes are done cooking, drain the water out of the pot. Add the Velveeta and cream cheese along with some salt and pepper. You can also add a small bit of milk to make the potatoes easier to mash. Then mash the potatoes until they are smooth and fluffy. Let the potatoes cool. After you let the potatoes cool for about 15 minutes, your dough should be ready. Take a large piece of dough and flatten it out, with a rolling pin, on a table coated with some flour. Use a circle cookie cutter and cut out pieces of dough. With a teaspoon, scoop a small amount of the potato filling and put it in the middle of a piece of dough. Close the dough around the potato and pinch shut with your fingers and a fork. Keep repeating this process until you run out of dough or filling. This should make about 20 pierogi. When you are done making the pierogi, boil them, five at a time, in a pot of water for two to three minutes, or until they float. Then fry them in pan with butter. Now they are ready to eat. You can top them with sour cream, onion, bacon, or your favorite gravy. Either way, this is a dish you are sure to enjoy.

Cheesecake Recipes

A cheesecake may seem simple enough, but it can actually be one of the hardest pastries to whip up for someone with no experience. And no matter how closely you follow cheesecake recipes, your cake could still fall apart if you don’t know the secret steps. Here are some less-popular, but very effective, cheesecake recipe tips to make your cheesecake a big hit.


Use only the best ingredients. Your cheesecake is just as good as the eggs you use to make it, so be sure to buy only the freshest. You should also be very careful about the cheese you choose – unless you’re on a strict diet, ditch the fat-free cream version and go for the real cream cheese. No matter what health buffs say, the real pastereurized kind still tastes better.
Be sure the ingredients are at room temperature, especially the cream cheese and the eggs. Otherwise, no matter how hard you try, your cheesecake will never be smooth. How do you bake when your cream cheese is frozen? Just microwave it on high for a little less than a minute or until it softens up. If you overdo it and the cream cheese melts, refrigerate it until it is just the right temperature.


Don’t bake the fruit. This tip seems simple enough, and yet many people forget about it. Just add in the fruits as toppings later so they can retain their freshness, flavor, and color.
Don’t peek! Opening the oven door when the cheesecake is not yet baked can ruin it. Your cheesecake can have cracks, or worse, may even fall apart. So restrain yourself until it’s done.
Wait thirty minutes before removing the cheesecake from the oven. After baking, just turn off the oven and let your cheesecake sit for another half hour. This waiting time will make it perfectly puffed and moist.

Cherry Cheesecake

Looking for the perfect dessert to bring for Thanksgiving dinner or a deliciously sweet treat to impress an important date? Then a cherry cheesecake is your answer. This simple yet intricately flavorful cheesecake is great for both a big family lunch fest and a romantic dinner, especially with a light sparkling wine.
And no, forget about buying the cherry cheesecake. Why don’t you make one instead? With the right tools and this simple how-to, you’ll be able to put together a scrumptious cherry cheesecake in no time.


For the crust, you will need a cup of graham cracker crumbs, sugar (about three to four tablespoons is enough), and some melted butter. To make the cheesecake, you will need softened cream cheese and about three to four medium-sized eggs (both the eggs and the cream cheese should be at room temperature). You will also need about fifteen ounces of chilled, cherry pie-filling, sugar, and vanilla extract.
Now that you have all the ingredients on hand, you can start by making the crust. Mix together the graham cracker crumbs, the melted butter and the sugar, and then force the mixture down into the bottom of a spring-form pan. Pop this in the oven and bake it at about 350 degrees for ten to twelve minutes.
While baking, go right on to making the cake. It’s a good idea to use an electric mixer to blend together the cream cheese, the eggs (remember to drop them in one by one), and then the vanilla and sugar. Once you get a firm consistency, bake it at about 450 degrees for ten minutes. Then, adjust the temperature to about 25 degrees lower and go on baking for another forty minutes.
You can then carefully take the cake off the pan and let the cake cool. Pop it in the refrigerator overnight (or for at least nine to twelve hours). Finally, generously spread the cherry filling over the cake.

Pumpkin Cheesecake

Not a lot of people have tried a pumpkin cheesecake, but those who have swear that they are addicted to it. A pumpkin cheesecake is perfect for someone who likes a cheesecake to have a fluffy, light texture and less sweetness. Interested in making one? Read on for a short how-to.
Start making your pumpkin cheesecake by combining one and a half cups of gingersnap crumbs with about a half a cup of toasted pecans, and then forcing the mixture down into a spring-form pan to make a gingersnap crust. Bake this in the oven for about ten to twelve minutes at 325 degrees.


Meanwhile, beat about ten to twelve ounces of cream cheese firmly and consistently until you achieve a smooth texture. Add the amount of sugar you want (usually about three-quarters cup is fine). Drop in the eggs – but hold on! Remember to drop them one by one, beating continuously as you do. About five eggs will do the trick. After this, you then drop in about one and a half cups of pumpkin puree, some cinnamon, and another three-quarters cup of some heavy cream.
Finished? You are now ready to bake the cake. Put it in the oven and leave it for about half an hour. You know that your cheesecake is done when the center is jiggly and edges are already nice and puffy. When it’s done, try running a knife on all sides of the cake before you let it cool off – this prevents the cake from having cracks.
Let the cake cool down for another thirty minutes (in the oven), and then pop it into your refrigerator. Twelve hours later, you have yourself a delicious pumpkin cheesecake. Invite your friends over to enjoy your creation with you, or take pleasure in it by yourself–just kick back and drink iced tea with your scrumptious pumpkin pie as you watch the sunset or your favorite TV show.

Saturday, September 06, 2008

Caviar nutrition

If you love caviar, but have no idea how to serve it, other than on a plate.... here is one idea, that is quick yet elegant: Caviar Hard Boiled Eggs:
6 hard-cooked eggs6 tablespoons caviar (red or black)1 tablespoon chopped chives or green onions1 tablespoon chopped parsley1 tablespoon mayonnaise or sour cream1 teaspoon freshly ground black pepper


Hard boil the eggs, and then shell them, cut them in 1/2 and remove the yoke. Mash these well and combine with the remaining ingredients. When it is thoroughly mixed together, spoon into the whites with a spoon, or pipe it in, using the rosette end of a pastry tube, or whatever pastry tube you prefer..
This can be served on a bed of greens and some french bread for a yummy appetizer or add more eggs for a light lunch or meal.
You can also serve caviar with crackers.
Caviar Cream Cheese Dip: 2 cups cream cheese1/4 cup minced chives1 small jar black caviar
Blend and serve as dip with crackers...
You can get very creative with caviar, most people love to have it mixed in with other ingredients for a special treat

.
Caviar by definition, is the salted roe of a large fish, usually sturgeon and is eaten as a delicacy. The Russian caviar is a favorite of many people. If you are just starting out with caviar, experiment and also get some great recipes from wherever you purchase your caviar, there are many specialty shops now, and there are many selling caviar online. The advantage to purchasing online, is that you can get many different types of caviar from around the world, why limit yourself to what is at the local store?
You can now organize your entire gourmet dinner online. With the fast shipping available and the internet anything is possible!.. If you are wanting to experiment more with gourmet foods and meals, try starting with caviar!